Wednesday, February 11, 2015

Purple Ice Cream: Purple Ice (Story 2 of 3)

The problem with the design from Purple Ice Cream (Story 1 of 3) was that actually I didn't want to be in purple. So from a drug store I bought a matte top coating and this led to slight improvement. At least not too shiny!

See the rest of the Ice Cream story
What makes it special: The matte effect on the purple dotted with orange

How long it lasts:
I stayed with the design of this step for two days.

To cook this look you need:

  1. Follow the steps from Purple Ice Cream (Story 1 of 3)
  • Apply the base coat
  • Apply two layers of the purple nail polish
  • Apply the hexagons
 2. Apply the matte nail polish. Wait to dry and matte.


Monday, February 9, 2015

Purple Ice Cream: Purple (Story 1 of 3)

I found that I have a few shades of purple and I decided to put one of them in good use.

See the other shades of this design:

What makes it special: The multicolour dots on the purple.

How long it lasts:
I stayed with the design of this step for about two or three days. Then I moved on.

To cook this look you need:
  • Three kitties
  • Base coat
  • Purple nail polish
  • Hexagon glitter nail polish
  • Top coat (optional)
Steps:
  1. Apply the base coat
  2. Apply two layers of the purple nail polish
  3. Apply the hexagons

Friday, February 6, 2015

Gray on Kitties: Shiny in Blue (Story 3 of 3)

This is the back to the roots edition of the design. After being shiny and matte, it's time to make those nails shiny again. 
To see the rest of the Gray on Kitties, visit:
What makes it special: The matte design is ok but if you like sparkles, then you definitely can go back and top it with something shiny suitable for your femme mood.

How long it lasts:
It depends how old is your base coat. Just like the matting coat, the glitter top coat works as a glue so it will tighten the edges of the nail polish! Keep in mind that old nail polish can not be saved forever. The glitter will give you extra day or two.

To make the gray you need:

Steps:
  1. Follow the steps from Gray on Kitties: Shiny (Story 1 of 3)
  • Apply the base coat. Wait to dry.
  • Apply two layers of gray nail polish. Wait to dry.
  • Apply a layer or two of the glitter-hexagon nail polish.
 2. Apply one or two coats of the glitter nail polish depending on the density you want to achieve. Wait to dry.

If you already have the matte, have no fear. Apply the glitter on top of the matte.


Thursday, February 5, 2015

Gray On Kitties: Matte (Story 2 of 3)

This is the second part of the story in gray. This is how the initial nail design evolves.

To see the rest of the Gray on Kitties, visit:
What makes it special: The initial design was a little too shiny and glitterish. This is not bad if you like this. However sometimes the situation forces us to be more matte. Matte is considered stylish and in addition with this design it worked out really well.

How long it lasts:
It depends how old is your base coat and what brand of matting top coat you apply. The matting top coat also works as a glue so it will tighten the edges of the nail polish! However keep in mind that old nail polish can not be saved forever. The matte will save you just to survive the day.

To make the gray you need:


Steps:

  1. Follow the steps from Gray on Kitties: Shiny (Story 1 of 3)
  • Apply the base coat. Wait to dry.
  • Apply two layers of gray nail polish. Wait to dry.
  • Apply a layer or two of the glitter-hexagon nail polish.
 2. Apply the matte nail polish. Wait to dry and matte.

Tuesday, February 3, 2015

Gray On Kitties: Shiny (Story 1 of 3)

This is the first step of the Nails Series. In other words, how with a little effort you can change the look and feel of your nail polish.


To see the rest of the Gray on Kitties, visit:

What makes it special: The key in this nail design is in the density of the glitter-hexagon and the right combination. Gray takes some of the shine and at the same time the pink brightens it. The light colours or the white hexagons add mosaic texture.


How long it lasts:
Generally it depends on the base and the base colour you choose. My L'Oreal lasts about 2-3 days. Usually the glitter and hexagon nail polishes straighten the base layers. In this case the gray is darker and the peels are clearly visible (to me) but the hexagon texture adds the effect of the light dots so basically it will give you another day or two with this design.

To make the gray you need:
  • 3 kitties
  • Base coat
  • Gray nail polish
  • Glitter-hexagon nail polish in light pink, light orange and light green or white.
  • Top coat (optional)
Steps:
  1. Apply the base coat. Wait to dry.
  2. Apply two layers of gray nail polish. Wait to dry.
  3. Apply a layer or two of the glitter-hexagon nail polish. 
  4. (Optional) You can apply top coat which will work as a glue for the rugged edges from the hexagon figures.

Monday, February 2, 2015

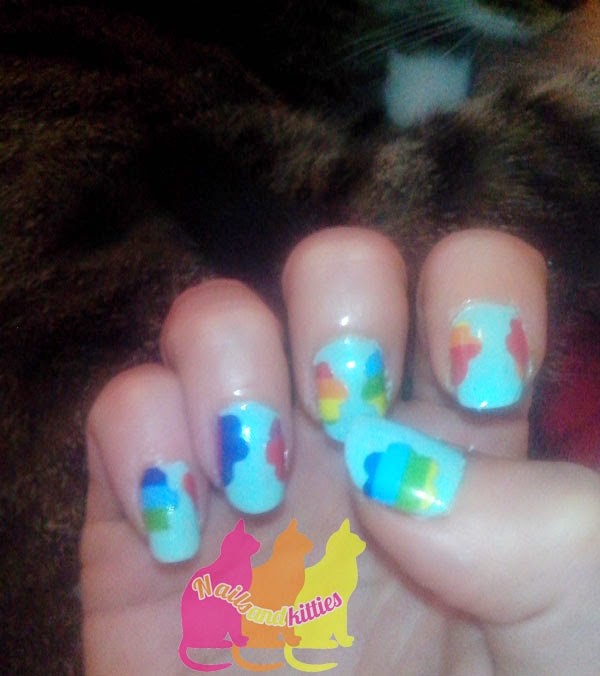
Rainbow Kitties in February

The initial idea was to apply simple rainbow stickers. When I did the first nail, my pinky, it turned out that the stickers are too thick and the plastic doesn't curve well enough to stick to my nail. In addition this design looks okay but once on the finger it turns out the stripes are too wide and I could fit two nails on one sticker. I pressed for a couple of minutes and then I gave up.

What makes it special: The rainbow colours.

How long it lasts: About a day. The stickers I used were kind of crappy and their edges started to peel off on the very first day.

To make the rainbow colour you need:
  • 3 kitties
  • Rainbow stickers
  • Base coat
  • Nail polish in color different than those you already have on your rainbow
  • Top coat
  • Punch press - in my case I have a flower but I believe that other shapes like hearts, stars or simple dots will work fine too
  • Scissors (optional)
Steps:
  1. Apply the base coat. Wait to dry.
  2. With the punch press make your rainbow flowers. You need 10 flowers.
  3. (optional) you can cut these into two or keep them intact as a whole flower. I chose to cut them.
  4. Place the stickers on your nails. 
  5. Apply top coat, or even two layers of top coat because thе sticker's edges 


Sunday, February 1, 2015

Winter Pirates and Cat Vikings

These winter pirates are not vikings but they look just fine.

What makes it special: The water tattoos you are going to use

How long it lasts: It depends it you are willing to apply top coat. The water tattoos I used were sort of easy to peel off. The top coat adds extra days for them on your nails.

You need:
  • 3 kitties
  • Base coat nail polish
  • White nail polish
  • Top coat (optional)
  • Water stickers/tattoos
To cook this look you need:
  1. Apply the base coat
  2. Apply two coats of white nail polish. Wait to dry.
  3. Meanwhile cut the water stickers into pieces so it can fit your fingers.
  4. Apply the water stickers according to the instruction. In my case I had to put the water sticker and press each piece for 30 seconds. 
  5. Apply top coat
Cat tip:
Use white nail polish because it will give better base for the water sticker. White makes good contrast.